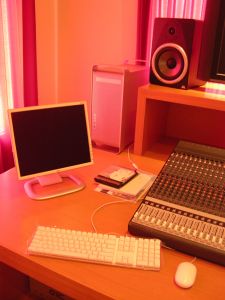
 One of the main benefits of putting fairly advanced technology in the hands of the consumer is that it allows for DIY projects that at one time only professionals with much financial backing could undertake. Take music recording, for example. These days it’s never been easier for start-up musicians young or old to build a recording studio right in their own home. Modern technology has even eliminated the need for cumbersome pieces of hardware like mixers. And the best part is that a fully functioning home studio can be put together without breaking the bank.
With that in mind, here’s how to setup a home recording studio for $2,000 or less. Bear in mind this tutorial is based on the premise the reader already has a computer. A laptop or desktop with at least 2 gigabytes of RAM (preferably 4) is needed as the central component of the studio.
- SETUP YOUR WORK AREA
Move excess furniture out of the room intended for the studio and position a desk, chair and secondary work spaces against the wall. Shelves, a rack or even box crates make good secondary work spaces.
- SOUNDPROOF THE ROOM
Soundproofing does not have to be a highly technical, expensive or even exact process. If the floor isn’t carpeted, simply cover it with carpet remnants or heavy rugs. If the acoustics in the room are oppressive, cover the walls with sound dampening foam. Mid-range foam can be found for around $10 for a 2-1/2” x 24” per panel. However, those on tighter budgets can opt for simple fabric rather than foam.
- GET A MIC
Arguably the most important component of any recording studio is the microphone. With a shoddy mic there is nowhere to hide, as the poor quality is evident on the recording. There’s no need to go completely high end with an option like Shure’s KSM 44 ($900), but those interested in making serious music recordings should spring for a decent mid-range option. Not only that, but it’s important to take the size of the mic’s diaphragm into consideration, as bigger is better as far as vocals are concerned. Sennheiser’s MK4 large-diaphragm mic ($299) is a solid mid-range option.
- INVEST IN A DRUM MACHINE
Non-pros will do well to forgo acoustic drums altogether, as the level of detail and exactitude needed to properly record them requires a comprehensive knowledge of audio engineering principals. The best alternative is a drum machine, and the good news is there are many options that won’t completely wipe out a modest budget. The Propellerhead Reason 6 is a nice mid-range audio rack that contains all relevant components, from synthesizers and samplers to EQ Settings and filters.
- INSTALL RECORDING SOFTWARE
The main reason it’s never been easier to set up a decent recording studio in the home has to do with the wide availability of quality recording software. The best option for those with a home studio would be Avid’s Pro Tools Express, which comes with the Mbox Mini and retails for $1446.
- CHOOSE THE RIGHT SPEAKERS AND HEADPHONES
This should be a relatively easy decision for those without much knowledge on the subject, as Yamaha is the studio standard and produces quality speakers. The HS8oM speakers ($349), for example, are produce quality sound.
There’s also no need to splurge on overpriced headphones. Options in the $50-$60 range, like Sony’s MDR models as well as certain Audio Technica headphones, will do the job just fine.
Once all the components are in place then it’s time to start making music. One other thing to keep in mind is to always budget 50-100 dollars for miscellaneous items such as cables and mic stands. This will ensure the home studio is up and running.
Justin Miller is a professional blogger that writes on a variety of topics including guitar lessons online. He writes for JamPlay.com, a leading online music educator offering 2,000+ acoustic guitar lessons for beginners in HD.
Latest posts by Canadian Home Trends (see all)
- Dining Room Design Tips - July 18, 2025
- Practical Luxury in Forest Grove - July 18, 2025
- The Hidden Value of Great Design - July 18, 2025


