Throw pillows are to your living room as jewelry is to fashion; the right pillows can compliment and enhance your space instantly and with minimal fuss. In that spirit, we challenge you to DIY a few of your own this fall. Here are a few ideas:
Repurposed Sweater Pillows
What you’ll need: old sweaters, stuffing or pillow forms, lightweight fusible interfacing

Photo Source: tidbits-cami.com
Visit Tidbits for full instructions on how to DIY these Repurposed Sweater Pillows.
Daddy’s-old-shirt Pillow
What you’ll need: ironed button down shirts, pillow forms or old pillows you want to cover, sewing materials, scissors, pins
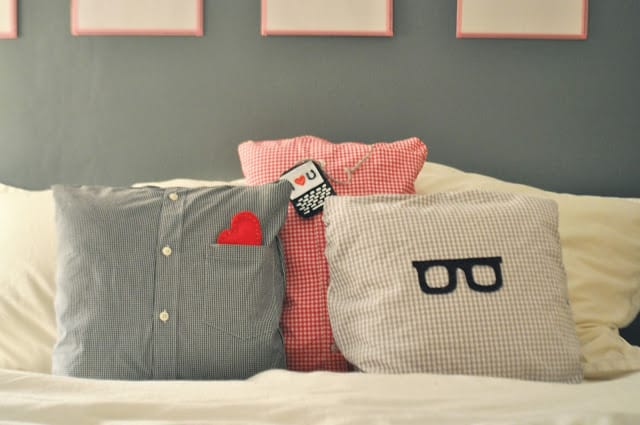
Photo Source: ducklingsinarow.com
Visit Ducklings in a Row for full instructions on how to DIY these Button-down Pillows.
Tassel Throw Pillow
What you’ll need: velvet fabric, embroidery thread or yarn, rectangular cardboard, sewing materials
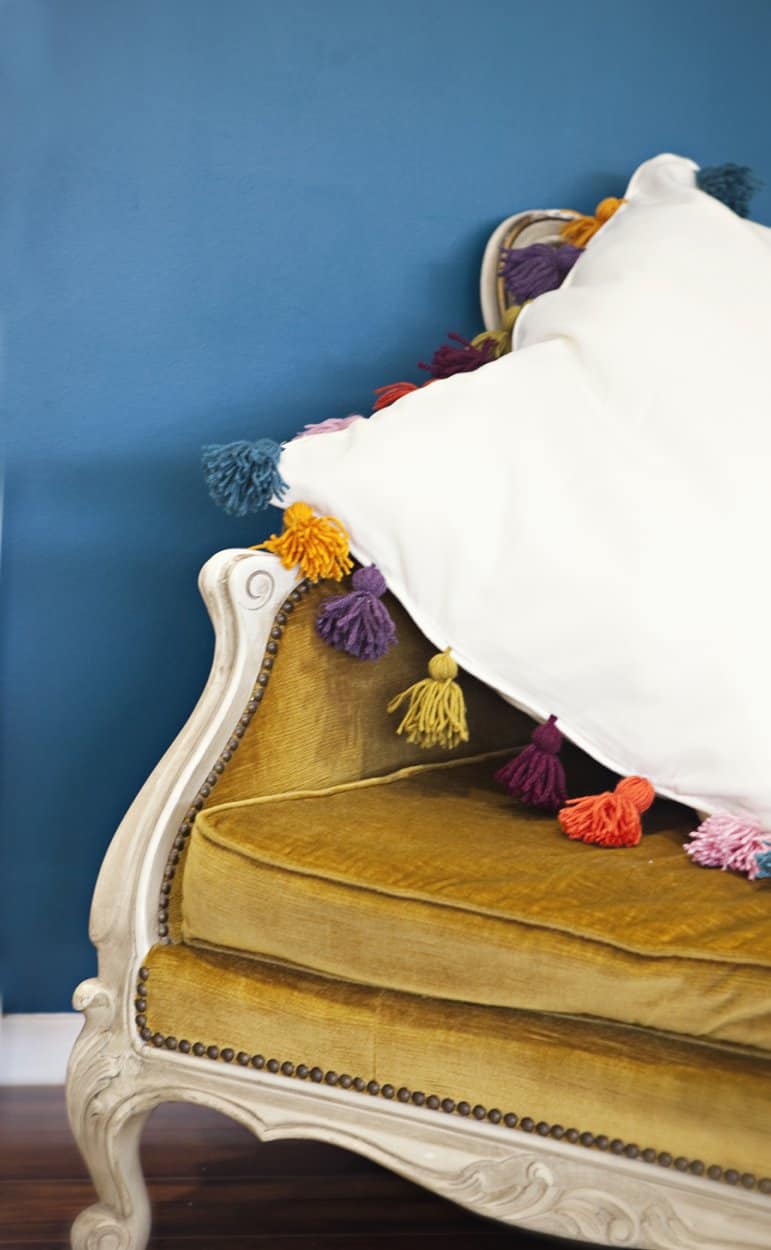
Photo Source: sewinginnomansland.com
Visit Sewing In No Mans Land for full instructions on how to DIY this Tassel Throw Pillow.
No-sew Bow Pillow
What you’ll need: fabric, pillow forms or old pillows you want to cover, sewing materials

Photo Source: instructables.com
Visit Instructables for full instructions on how to DIY this No-sew Bow Pillow.
Pom Pom Pillow
What you’ll need: pillow cover or pillow, tassle trim, glue guns and glue sticks, scissors, cardboard
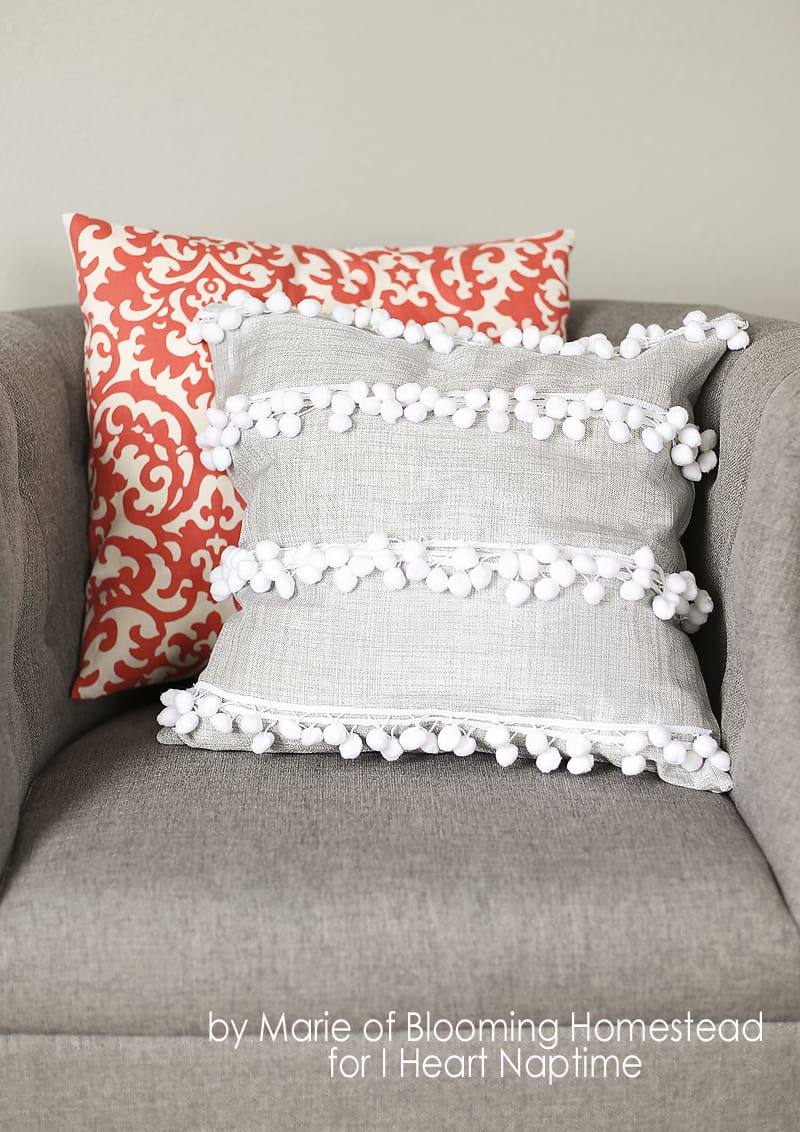
Photo Source: iheartnaptime.net
Visit I Heart Naptime for full instructions on how to DIY this Pom Pom Pillow.
Custom Image Transfer Pillow
What you’ll need: fabric transfer paper, iron, inkjet printer, scissors, pillow case
Photo Source: canarystreetcrafts.com
Visit Canary Street Crafts for full instructions on how to DIY image transfer onto fabric.
Latest posts by Canadian Home Trends (see all)
- 2026 Design Trends: The Evolution of Home Design - March 28, 2026
- Expert Bathroom Design Secrets from Canada’s Best - March 28, 2026
- Treasure Hunting: Discovering Unique, Locally Made & Vintage Home Décor - March 28, 2026