 Spook up your front porch and greet guests with ghoulishly easy decoupage pumpkins from our DIy Editor, Nicholas Rosaci – no knives or scooping required.
Materials Required:
- Pumpkins, real or faux, various sizes
- Spray paint – Matt Black, White and / or specialty colour of your choice
- Inexpensive paint or foam brush to apply Mod Podge
- Mod Podge or pre mixed wallpaper paste
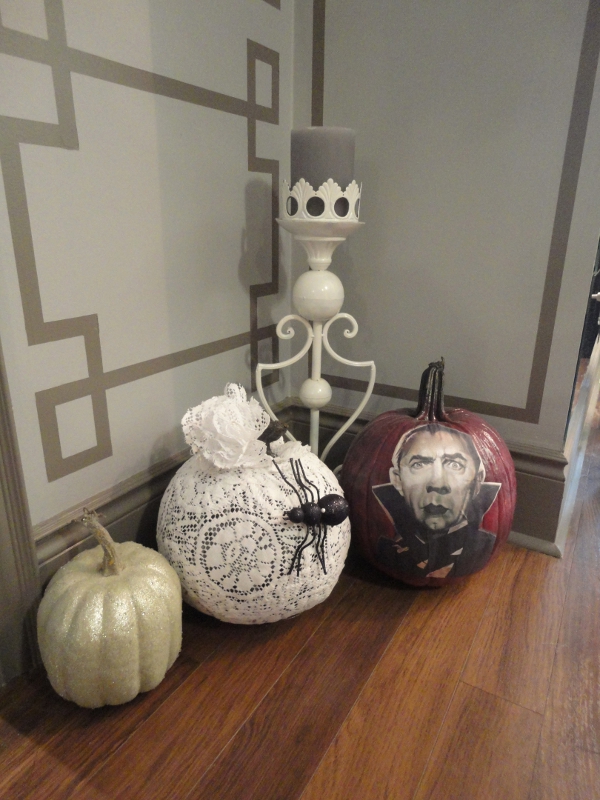 Graphic black and white imagery sourced from the Internet and printed on your inkjet printer. I used freaky faces of Halloween legends but this project also looks fierce covered in creepy bug and insect images!
Instructions:
- Place pumpkins on drop cloth and spray paint white and/or black.
- Apply Mod Podge to center of pumpkin and overlay your image on top. Next brush on a 2nd coat of Mod Podge over the printed image. Note: The more you brush the more the ink may smear so be minimal with your brushing technique & work quickly. Remove any air bubbles by lightly poking the picture with a sewing needle.
- When pumpkins are dry, coat generously with another coating of the Mod Podge.
- Optional- To create a bloodied effect glue a red crayon or two to the top of the pumpkin using a glue gun and use your hair dryer to melt the crayon down the pumpkin!
- Optional: Use pushpins and/or glue to attach jeweled spiders and other Halloween ornaments as desired.
The following two tabs change content below.

Nicholas is the DIY Editor for Canadian Home Trends Magazine, an award-winning Designer Decorator, and appears as a guest expert on City TV’s CityLine. As Principal Designer, Interior Decorator and Stylist for Nicholas Rosaci Interiors, Nicholas creates chic, confident and glamorous spaces that cross the divide between Modern and Traditional.
Latest posts by Nicholas Rosaci (see all)
- Glamorous Office Design - July 13, 2025
- Nicholas Rosaci’s Modern Canadian Cottage Design Board - July 13, 2025
- How Do You Make An Easter Special? - July 13, 2025