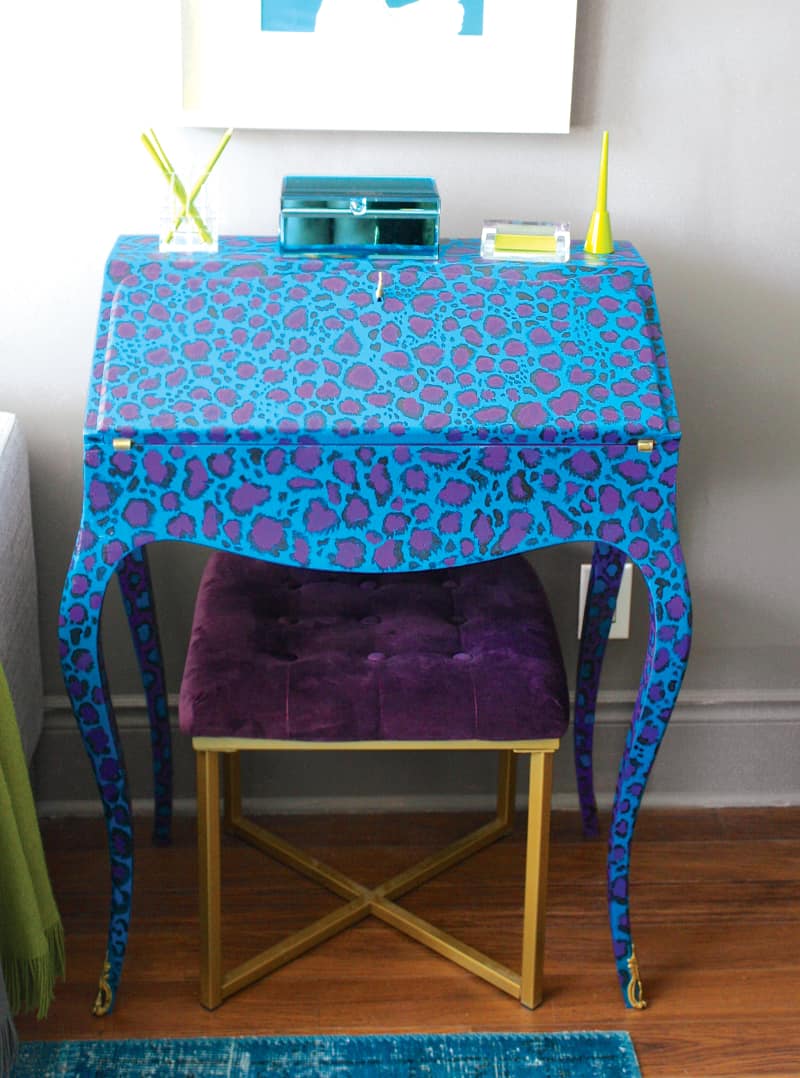
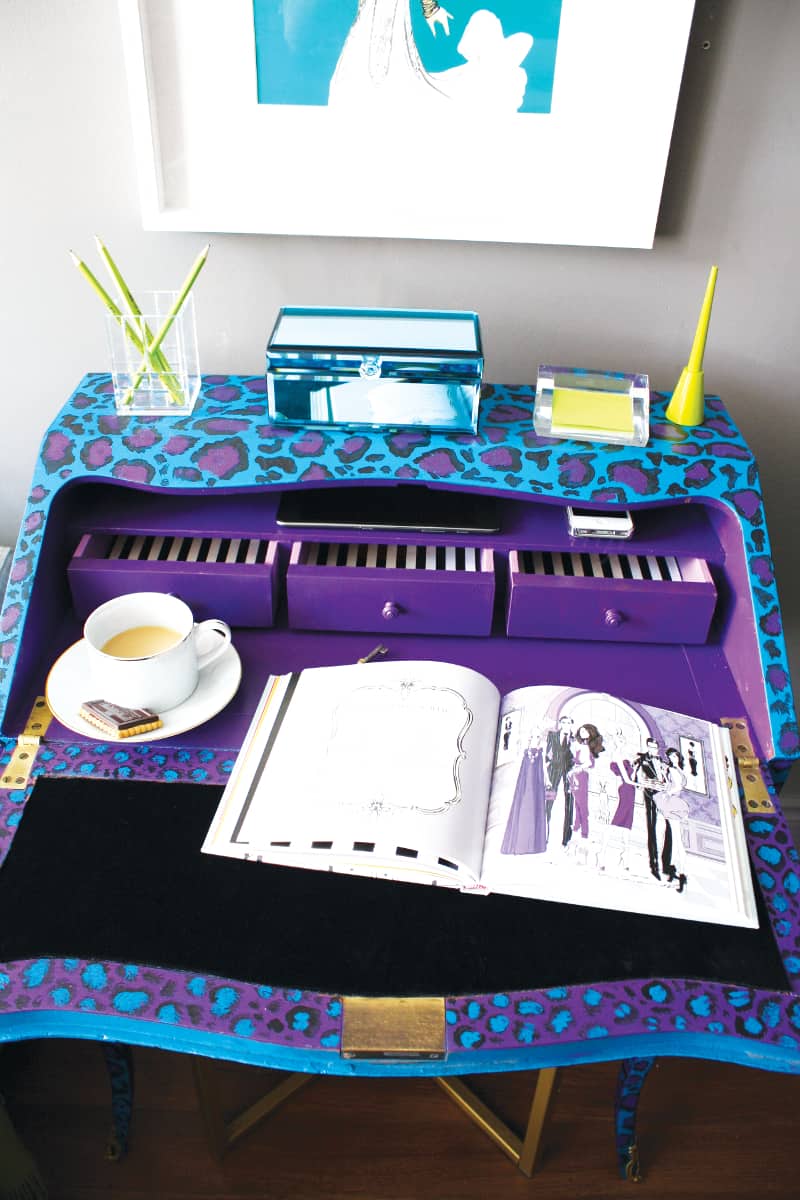
Home Trends’ DIY Editor, Nicholas Rosaci energizes a tired secretary desk into a chic leopard charging station .
MATERIALS LIST
Paint
Rotary or Hand Sander
Fine, Medium and Course Sandpaper
Wood Cleaner
Tack Cloth
Metal Polish
Wood Filler
Small Foam Paint Roller
Paint Brush – Oval Wash Brush style
Giftwrap for Drawer Lining (Optional)
I found this chic secretary desk discarded at the edge of someone’s driveway, probably due to some imperfections and chipped veneer – what a shame! The desk turned out to be a solid quality piece of reproduction furniture with great potential for a fabulous makeover.
PERFECT PREP
I started by cleaning the table and polished any metal adornments. I then sanded the old table finish off using a rotary sander with coarse, medium, and fine sandpaper grits and a hand sanding sponge for the more delicate rounded areas. Any surface imperfections or damaged veneer edges were filled in and sculpted with several thin layers of wood filler sanded smooth. A basecoat primer was then applied and lightly sanded with an ultrafine grit between coats. A quick wipe down with a lint free tack cloth finally revealed a fab smooth finish.
LAYERED COLOR
The first coat of chic I selected for the table was a rich deep teal blue (Coastal Jetty, Behr, MQ4-64) which I applied with a foam roller and, once fully dry, lightly sanded again to create the perfect base for a second coat.
I used a lux lavender color paint (Orchid Blush, CIL, 41 RB 24/309) for the secret compartments and the inside of the drawers, for a peek-a-boo of pretty. The drawers were lined with black and white striped giftwrap for an even more graphic punch.
FLAWLESS SPOTS
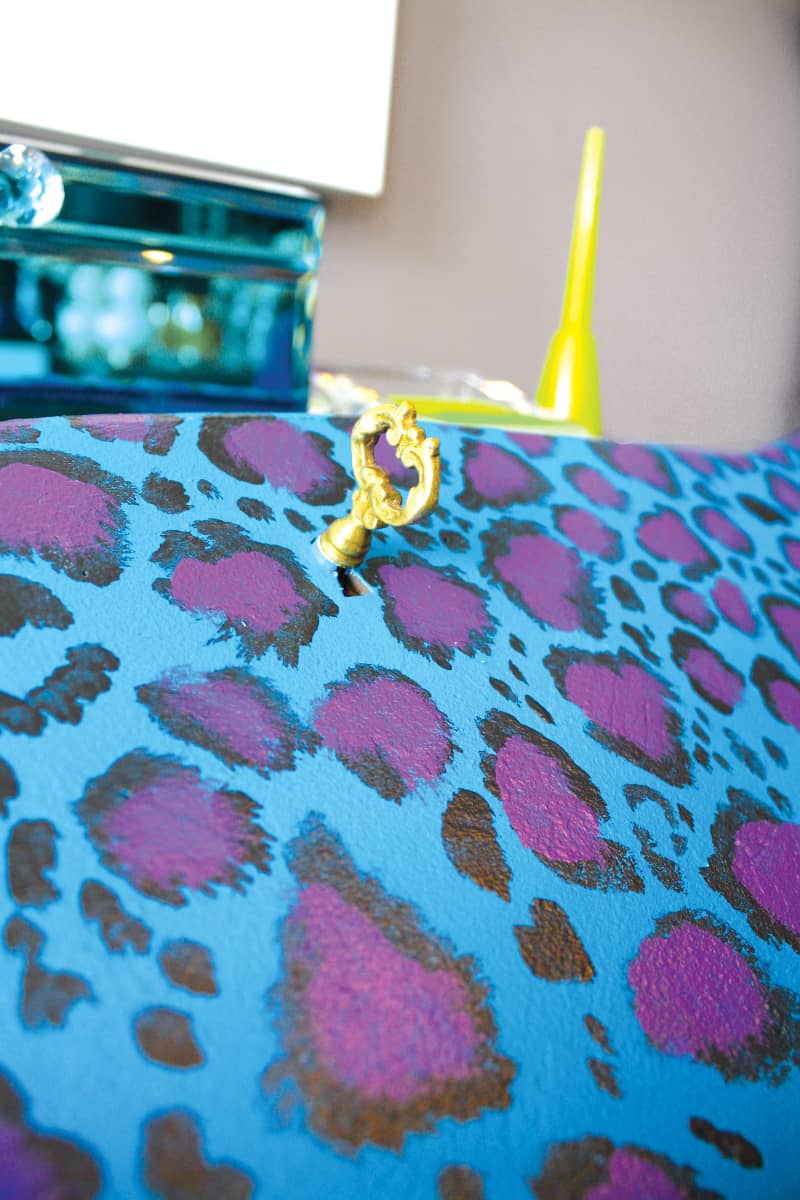
Once cured, it was time to get spot on with a funky leopard print pattern. I used several photographs of celebrities in chic leopard dresses to get inspiration on how the spots vary in size and intensity, and how they naturally flow in one direction and then migrate in another. This was truly the easiest part and a lot of fun!
To paint the leopard spots, I used an oval wash brush from Michaels. This particular type of brush has a rounded tip which makes blending colours easy and creates soft edges ideal for leopard spots. I dipped the brush lightly into high gloss black paint and made blotchy, loosely formed leopard spots by pressing and dabbing the brush onto the surface so that the bristle tips slightly fan out. This technique creates imperfect edges which makes the spots look more natural, realistic and hairy. As a finishing touch, I dabbed a rich purple (Perpetual Purple, Behr, MQ5-42) in the centre of the black spots. The final look is on point and something to definitely purr, meow or roar about.
Latest posts by Nicholas Rosaci (see all)
- Glamorous Office Design - June 26, 2026
- Nicholas Rosaci’s Modern Canadian Cottage Design Board - June 26, 2026
- How Do You Make An Easter Special? - June 26, 2026