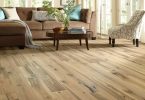
 When floors lack luster, a space can look tired and out of date. But replacing your flooring can be costly and the decisions involved in selecting a new floor can leave your head spinning. Breathe new life into your space and enjoy the beauty of natural wood floors for years to come with a simple refinishing.
The first thing you need to do is clear the area of all furniture and wash the floors. Make sure there is no floor wax by checking in a discreet area using a cloth with paint thinner. Once the floor’s been prepped, repairing is simple with the following steps:
- Lightly sand the surface with 180 or 220 grit sandpaper using a power sander to allow for greater product bondage. Do not remove the stain. Hand sand around trim and corners.
- Vacuum the area to remove dust, then wipe down the surface with a tack cloth (if you have an oil-based finish) to pick up any dust left behind.
- Apply Minwax Super Fast-Drying Polyurethane for Floors with a good quality bristle brush and lamb’s wool applicator pad. You can select the finish that works best with your space, as this product comes in gloss, semi-gloss, and satin options. Start by using the brush to cut in from any edges or trim and establish a wet edge that you can work into with the lamb’s wool applicator. Always apply thin uniform coats in the direction the boards are laid. Additional coats can be applied without sanding if done within 12 hours; two to three coats are recommended.
Keep in mind the floor will feel dry in a few hours, but remember it will not be fully cured for 30 days, so exercise caution when moving furniture on the newly-finished floor.
Tip: Remember to always plan your exits from the room — you don’t want to be trapped in a corner for hours.
www.newscanada.com
Latest posts by Canadian Home Trends (see all)
- Understanding The Importance of Great Design - February 21, 2026
- The Green Effect: To Clean or Not to Clean - February 21, 2026
- Functional Warm Addition - February 21, 2026


