For those new to the process, cooking with cannabis may seem like a complicated task. In many ways this is true, there are lots of steps to keep track of to ensure the best possible end result, but the process is straightforward and easy to remember once mastered. The experts at Canvas Cannabis share these tips to get you started!
Choose the right strain type for you! An important first step is ensuring you have the right strain type to suit your desired experience. Indica tends to be more sedative, so those looking for a sleep aid should seek a strain tending toward the indica side. Sativa strains are known to be more uplifting, euphoric and are often thought to improve creativity. Finally, there are the high CBD strains. These strains are used by many to alleviate a number of different medical conditions (to find out if CBD is right for you, make an appointment with your family physician). You should also be mindful of the cannabinoid content in the strain you choose. The higher the THC, the stronger the effects of your edibles. The friendly budtenders at Canvas Cannabis are always happy to help with the right product selections.
Do not use raw cannabis. The cannabinoids in cannabis must be activated before they are extracted and can be used in edibles. Cannabinoids are heat activated for use in edibles through a process called decarboxylation.
- Set your oven to 200 degrees F and line a baking sheet with parchment paper to help prevent burning.
- Crumble your cannabis into small pieces. The buds should be about the size of a nickel.
- Place the baking sheet in the oven for 25-35 mins or until the cannabis is golden brown. If you smell burning, remove the cannabis from the oven right away.
- Allow the cannabis to cool until you can handle it.
Choose your fat! Cannabinoids need to be extracted into fats before they can be used in cooking. Butter, oils and milk are all great mediums to use for cooking with cannabis.
- Grind your cannabis and mix it with the fat of your choosing.
- Place the cannabis and fat mixture in a slow cooker, or double boiler and cook on a low temperature for 3 to 4 hours.
- Strain the cooked mixture using cheesecloth to remove all the plant matter.
- Use your cannabis mixture to create your favorite recipes!!!


Products such as the Levo II and other infusers can automate the process of making cannabis infused butter and oils. Check canvascannabis.ca for products such as the Levo and any other products needed to aid in your cooking with cannabis journey.
Cooking with Cannabis – No-bake Cheesecake Recipe
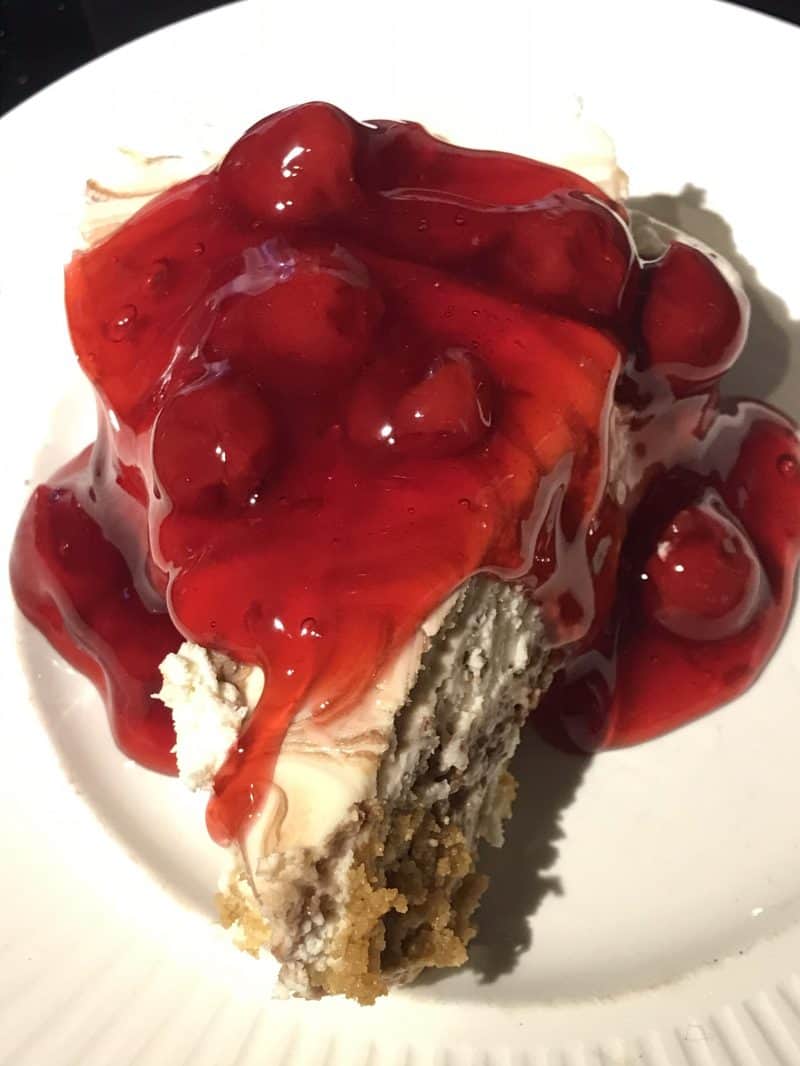
This delicious cannabis infused cheesecake recipe comes from one of the staff at Canvas Cannabis and is a great way to start cooking with cannabis!
Crust:
- 1 1/4 cups graham crumbs
- 1 Tablespoon melted butter
- 3 Tablespoons Canna butter
- 2 tablespoons brown sugar
Filling:
- 1 cup heavy whipping cream
- 1/4 cup Canna infused cream
- 3 packages of cream cheese
- 2 tablespoons pure vanilla extract
- 1 cup white granulated sugar
- 1/4 cup icing sugar
- 1/2 teaspoon salt
- 1/2 teaspoon lemon juice
Chocolate swirl:
- 1/2 cup chocolate
- 1 tablespoon Canna butter
Cooking with Cannabis – No-bake Cheesecake Recipe Directions:
1) In a bowl, mix together graham crumbs, brown sugar and both melted butters until slightly moistened. Press into the bottom of a spring form pan. Cool in the refrigerator while you prepare the filling.
2) In a bowl, beat the whipping cream, canna cream and vanilla on high speed until it forms stiff peaks, set aside.
3) In a larger, separate bowl, mix together the softened cream cheese, white sugar, icing sugar and salt. With the mixer on slow to start with, beat until smooth, add lemon juice and mix in. Slowly mix in the whipped cream mixture until fully combined.
4) Pour into the spring form pan with the crust. Use a spatula to even it out.
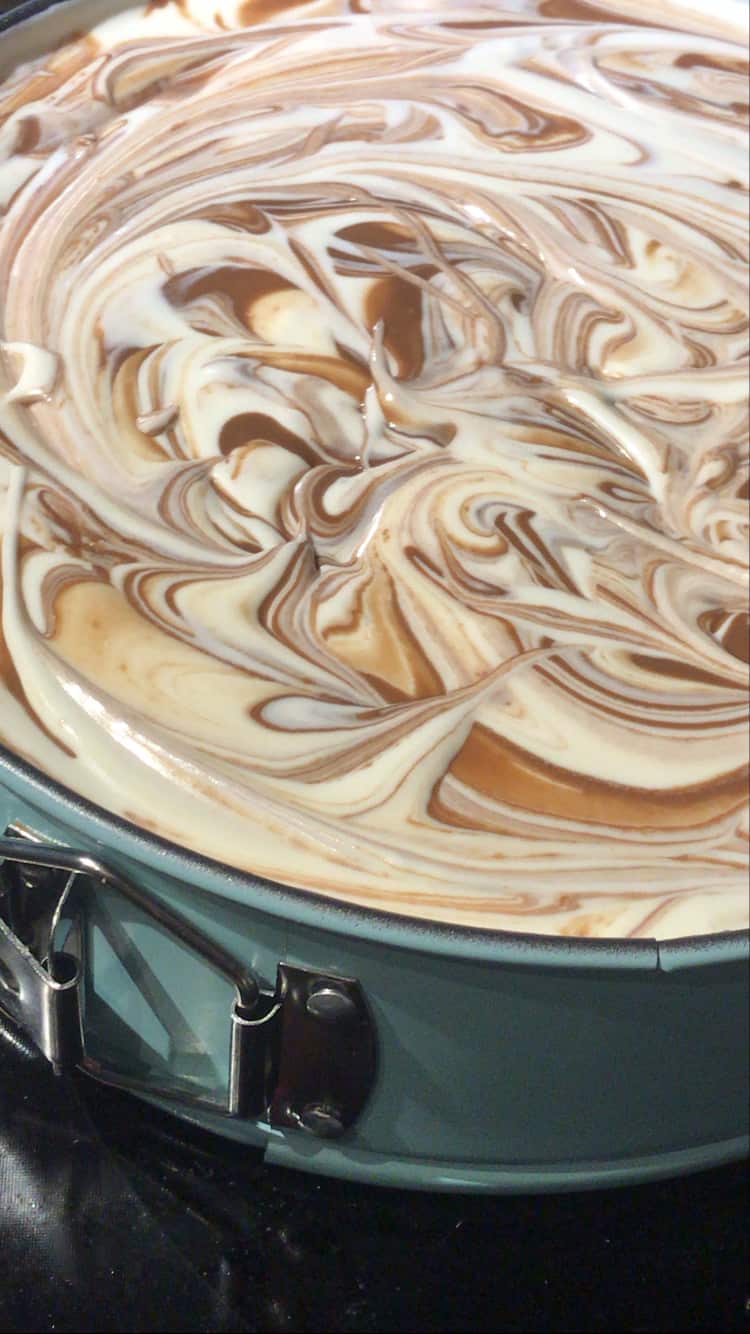
5) Melt chocolate and Canna butter in a microwave safe bowl in 10 second increments, stirring between each increment until melted and smooth. Immediately pour on top of the cheesecake in lines. After the chocolate is poured on, use a butter knife to swirl the chocolate gently.
6) Refrigerate for minimum 12 hours.
8) Add a fruit topping of your choosing on top after slicing (optional). Enjoy!
Latest posts by Canadian Home Trends (see all)
- 2026 Design Trends: The Evolution of Home Design - July 13, 2026
- Expert Bathroom Design Secrets from Canada’s Best - July 13, 2026
- Treasure Hunting: Discovering Unique, Locally Made & Vintage Home Décor - July 13, 2026